About Me

My photo
Hi Friends, I am Sandeep CC and some people know me as System Administrator. I have started my professional career from 2008. I have been working as System Administrator on Linux Server and Windows Client. I am here to share my Knowledge in which I have experienced and which I have come across till now, It could be help to you people. In case anything wrong or any improvements in my post steps, Please comment to the post, Feel free to contact me by posting comments on this blog. Thanks and Regards, Sandeep CC

Thursday, December 29, 2011

Edit FSTAB file in Single User Mode in REDHAT LINUX

Today I Faced Problem In My Company, My Linux RHEL5 Server was running suddenly power gone, UPS didn't worked properly, Server got crashed, When I was trying to start it was coming one screen and structuring on the same place, It was asking to give Root Password, When I given it was showing like System Repair.


I had tried with fsck -r & e2fsck -r /home command for checking and recovering/repairing corrupted files (e2fsck -r /home will warn you to fix it corrupted file, we can recover superblock files also). but it was showing error in /home drive, then later i reminded that i had mounted one directory in /home. checked error was getting in /home only with where i had mounted the one directory. When System got crashed that time /home directory had got unmounted and directory size was showing with 0 size, it was showing like total files 0. fsck & e2fsck commands also not recovered corrupted/superblock files.

Later thought to edit /etc/fstab file because system was getting problem with mounted directory in /home/xxx, I entered in single user mode by giving init 1 run level, but here i could not edit file, i was entering in file by vi editor but couldn't saved it, it was getting error read only permission, then i had done remounting /etc directory for getting permission to edit and save /etc/fstab file.

#mount -o remount,rw /etc

Now i can edit /etc/fstab file in single user mode, deleted mounted /home/xxx directory line from fstab file and restarted (init 6), Finally Server got up and started working fine....


Thanks & Regards,
Sandeep CC

Wednesday, November 23, 2011

Configure Squid Authentication Password on REDHAT LINUX


Configure Squid Authentication Password


Before configuring authentication user and password 1st configure SQUID and check whether it is working fine without any authentications [Click here to check Installation steps of Squid/Proxy]

You can configure Squid to prompt users for a username and password. Squid comes with a program called ncsa_auth that reads any NCSA-compliant encrypted password file. You can use the htpasswd program that comes installed with Apache to create your passwords [Click here to check Installation steps of APACHE/WEBSERVER]

Create squid_passwd file on /etc/squid/ directory and you need to make sure that it's universally readable.

[root@sandeeplinux-server squid]# touch squid_passwd
[root@sandeeplinux-server squid]# chmod o+r squid_passwd

Use the htpasswd command to add users to the password file. You can add users at anytime without having to restart Squid. Example: User Name = sandeep with sandeep123 password

[root@sandeeplinux-server squid]# htpasswd /etc/squid/squid_passwd sandeep
New password:
Re-type new password:
Adding password for user sandeep
[root@sandeeplinux-server squid]#

Find your ncsa_auth file using the locate command.

[root@sandeeplinux-server squid]# locate ncsa_auth
/usr/lib/squid/ncsa_auth
/usr/share/man/man8/ncsa_auth.8.gz
[root@sandeeplinux-server squid]#

Enter or un-comment bellow lines in /etc/squid/squid.conf file

[root@sandeeplinux-server squid]# vi squid.conf

auth_param basic program /usr/lib/squid/ncsa_auth /etc/squid/squid_passwd

(Add or un-comment above line in auth_param Session)

acl ncsa_users proxy_auth REQUIRED
http_access allow ncsa_users

(Add above line in ACL Session)

Save & Exit:

Restart Squid Server

[root@sandeeplinux-server squid]# service squid restart
Stopping squid: ................ [ OK ]
Starting squid: . [ OK ]
[root@sandeeplinux-server squid]#


Now Open Browser on client machine (Windows/Linux Client) It will ask for User name and Password, Give above created user name and password, Now you can access Internet...

Thanks and Regards,
Sandeep CC

Tuesday, November 22, 2011

Configure APACHE Web Server On REDHAT LINUX-5


     CONFIGURATION OF APACHE (HTTPD) SERVER ON RHEL-5


Required RPM Packages:
httpd-2.2.3-6.el5.i386.rpm (This package available on RHEL DVD)

Installation Procedure:

[root@freedomcorp Server]# rpm -ivh httpd-2.2.3-6.el5.i386.rpm
warning: httpd-2.2.3-6.el5.i386.rpm: Header V3 DSA signature: NOKEY, key ID 37017186
Preparing...                ########################################### [100%]
   1:httpd                  ########################################### [100%]
[root@freedomcorp Server]#

Start, Stop & Restart Procedure:


[root@freedomcorp Server]# service httpd start
Starting httpd:                                            [  OK  ]
[root@freedomcorp Server]#

[root@freedomcorp Server]# service httpd restart
Stopping httpd:                                          [  OK  ]
Starting httpd:                                            [  OK  ]
[root@freedomcorp Server]#

NOTE: In-case if getting any issue while installing regarding dependency packages, then try with bellow things...(This is not a permanent solutions) 

[root@freedomcorp Server]# rpm -ivh httpd-2.2.3-22.el5.i386.rpm apr-1.2.7-11.i386.rpm apr-util-1.2.7-7.el5.i386.rpm postgresql-libs-8.1.11-1.el5_1.1.i386.rpm

You will get config file in /etc/httpd/conf path, Modify with httpd.conf file as per your requirement...

Example: You can put your own page as home page in httpd.conf file
DirectoryIndex index.html index.html.var My-Own-Home.html

This File should available on /var/www/html/My-Own-Home.html

You can put your own designed webpage in /var/www/html/ path

Now check with server and client machien


http://localhost (Server)
http://servername (Server & Client)
http://server_IP (Server & Client)


Troubleshooting: If by server name is not opening in client machine then you have to configure DNS server (Click Here to Configure DNS Server) for name resolving, If by IP not working in client or server machine then check with httpd service...


Thanks and Regards,
Sandeep CC

Friday, October 28, 2011

USEFULL SHORTCUT KEY's

List of shortcut keys

Insert
i Inserts text to the left of the cursor.
I Inserts text at the beginning of the line, no matter where the cursor is positioned on the current line.

Append

a Begins inserting after the character (append) on which the cursor is positioned.
A Begins inserting at the end of the current line, no matter where the cursor is positioned on that line.

Open

o Begins inserting text on a new, empty line that is opened for you, below the current line. This is the only command that will allow you to insert text BELOW the LAST line of the file.
O Begins inserting text on a new, empty line that is opened for you, above the current line. This is the only command that will allow you to insert text ABOVE the FIRST line of the file.

Deleting,copying and changing

d Delete text. (see explanation above)
y Copy text (that is, yank it into a holding area for later use). (see explanation above)
c Change text from one thing to another, which you will type. (see explanation above)
! Filter text through a program.
< Shift a region of text to the left.
> Shift a region of text to the right.

Single Key Movements

h Move cursor to the left one character.
l Move cursor to the right one character.
j Move cursor down one line.
k Move cursor up one line.
^ Move cursor to the beginning of the line.
$ Move cursor to the end of the current line.
1G Move cursor to the first line of your document. Other numbers will move to the line specified by number (ex. 50G goes to the 50th line).
G Move cursor to the last line of your file.
CTRL U Move cursor up in file 12 lines. Hold down the key marked CTRL (stands for control) and type U. CTRL is like another shift key.
CTRL D Move cursor down in file 15 lines.
w Move cursor forward to the next word, stopping at punctuation.
W Move cursor forward to the next word, ignoring punctuation.
e Move cursor forward to the end of the word, stopping at punctuation.
E Move cursor forward to the end of the word, ignores punctuation.
b Move cursor backwards to the pre ous word, stopping at punctuation.
B Move cursor backwards to the pre ous word, ignores punctuation.
H Move cursor to the top line of the screen, (as opposed to the top of the document which may not be the same place).
M Move cursor to the middle of the screen.
L Move cursor to the last line on the screen.
% Move cursor to the matching parenthesis, bracket or brace. Great for debugging programs.
( Move cursor to the beginning of the pre ous sentence (where a punctuation mark and two spaces define a sentence).
) Move cursor to the beginning of the next sentence.
{ Move cursor to the beginning of the current paragraph.
} Move cursor to the beginning of the next paragraph.
; Repeat the last f or F command (see below).

Almost Single Key Movements

' Move cursor to a pre ously marked location in the file. (ex. ma marks the location with the letter a, so a (apostrophe a) moves back to that location).
f Find the character corresponding to the next keystroke typed. Move the cursor to the next occurrence of that character (on the current line only).
F Same as f but movement is backwards.

Useful

x Delete character(s) to the right of the cursor, starting with the one beneath it.
r Replace the character under the cursor with the next character you type. This can be a very useful command. If you wanted to split up a line between two words, you might put the cursor on the blank space before the word you would like to go on the next line and type r . This would replace the space between the words with a carriage return and put the rest of the line onto a new line.
J Join lines; the opposite of the line splitting operation above. This will join the current line with the next line in your file. Also very useful.
R Replace lines; puts you in INSERT mode but types over the characters that are already on the current line.
p Paste line(s) you deleted (or yanked) back into the file. This is an excellent command if you want to move a few lines somewhere else in your file. Just type 3dd to delete three lines, for example, and then move to where you want those lines to be and type p to paste the lines back into your file below the cursor.
. The period . command repeats the last text modification command, whatever it may have been (insert, deletion, etc).
:r filename RETURN Read a file into the current file being edited. The file be added gets placed below the current cursor position. Please note the colon : before the r in this command.
CTRL L Redraw the screen. If somebody writes to you while you are in the middle of and junk appears all over your screen, dont panic, it did not hurt your file, but you will have to hold down the CTRL key and type L to clean it up (CTRL L).
d$ Delete (including the current character), to the end of the line.
d^ Delete (excluding the current character), to the beginning of the line.
dw Delete a word(s), stops at punctuation.
dW Delete a word(s), ignoring punctuation.
de Delete to the end of next word.
dd Delete a line(s).
dG Delete from the current line to the end of the document. CAREFUL: Slightly dangerous.
dH Delete from the current line to the line shown at the top of the screen.

Search and Replace

/the Finds the next occurence of the. This will also find their, them, another, etc.
?the Finds the pre ous occurence of the.
n Repeats the last search command. Finds the Next occurence.
d/the Deletes until the next occurence of the. This is to demonstrate how the delete prefix can be used with any cursor movement command.

Exit

ESC :wq RETURN Save and exit
ESC :q! RETURN Exit WITHOUT saving changes

Wednesday, October 19, 2011

Configure DHCP On REDHAT LINUX-5


DYNAMIC HOST CONTROL PROTOCOL (DHCP)

Setup:
Server: sandeeplinux-server (192.168.4.1 Local Network IP)
Client: Linux & Windows XP/2003 etc...

Requirement: This DHCPD package available on RHEL5 DVD only
dhcp-3.0.5-3.el5.i386.rpm

Installation Of Required Packages:

[root@sandeeplinux-server ~]# rpm -qa |grep dhcp
dhcpv6_client-0.10-33.el5
[root@sandeeplinux-server ~]#

[root@sandeeplinux-server RHEL5_Total_Pack]# rpm -i dhcp-3.0.5-3.el5.i386.rpm
warning: dhcp-3.0.5-3.el5.i386.rpm: Header V3 DSA signature: NOKEY, key ID 37017186
[root@sandeeplinux-server RHEL5_Total_Pack]#

Configure DHCP config file:

NOTE: Modify dhcpd.conf file (Before Modifying any Files take one backup copy)

In this file you will get information to modify dhcpd.conf.sample file which located in “/usr/share/doc/dhcp-3.0.5”

[root@sandeeplinux-server ~]# cd /etc/
[root@sandeeplinux-server etc]# cat dhcpd.conf
#
# DHCP Server Configuration file.
# see /usr/share/doc/dhcp*/dhcpd.conf.sample
#[root@sandeeplinux-server etc]#

GO TO --> /usr/share/doc/dhcp-3.0.5/

[root@sandeeplinux-server etc]# cd /usr/share/doc/dhcp-3.0.5/
[root@sandeeplinux-server dhcp-3.0.5]#

[root@sandeeplinux-server dhcp-3.0.5]# vi dhcpd.conf.sample
ddns-update-style interim;
ignore client-updates;

subnet 192.168.4.0 netmask 255.255.255.0 {

# --- default gateway
option routers 192.168.4.1;
option subnet-mask 255.255.255.0;

option nis-domain "domain.org";
option domain-name "domain.org";
option domain-name-servers 192.168.4.1;

option time-offset -18000; # Eastern Standard Time
# option ntp-servers 192.168.4.1;
# option netbios-name-servers 192.168.4.1;
# --- Selects point-to-point node (default is hybrid). Don't change this unless
# -- you understand Netbios very well
# option netbios-node-type 2;

range dynamic-bootp 192.168.4.128 192.168.4.254;
default-lease-time 21600;
max-lease-time 43200;

# we want the nameserver to appear at a fixed address
host ns {
next-server marvin.redhat.com;
hardware ethernet 12:34:56:78:AB:CD;
fixed-address 192.168.4.100;
}
}
[root@sandeeplinux-server dhcp-3.0.5]#

Now Try To Start DHCPD Service:

[root@sandeeplinux-server RHEL5_Total_Pack]# service dhcpd status
dhcpd is stopped
[root@sandeeplinux-server RHEL5_Total_Pack]# service dhcpd start
Starting dhcpd: [FAILED]
[root@sandeeplinux-server RHEL5_Total_Pack]# chkconfig dhcpd on
[root@sandeeplinux-server RHEL5_Total_Pack]#


IF ITS GETTING FAIL TO START MEANS copy dhcpd.conf.sample file to dhcpd.conf file

[root@sandeeplinux-server dhcp-3.0.5]# cp dhcpd.conf.sample /etc/dhcpd.conf

It will ask for over write dhcpd.conf file give YES

[root@sandeeplinux-server dhcp-3.0.5]# service dhcpd restart
Shutting down dhcpd: [ OK ]
Starting dhcpd: [ OK ]
[root@sandeeplinux-server dhcp-3.0.5]#

Now Check DHCP with Windows Client:


Go To My Network Places --> Properties --> Local Area Connection --> Properties --> General Tab --> Internet Protocol (TCP/IP) --> Properties --> Obtain an IP Address Automatically --> OK

Wednesday, September 21, 2011

Install NetBeans IDE on REDHAT LINUX-5


Install NetBeans IDE 6.9.1 RHEL5

Server: sandeep-linux-server (Local IP: 172.16.4.81)

What is NetBeans?

The NetBeans IDE (integrated development environment) is available for Windows, Mac, Linux, and Solaris. The NetBeans project consists of an open-source IDE and an application platform that enable developers to rapidly create web, enterprise, desktop, and mobile applications using the Java platform, as well as JavaScript and Ajax, Ruby and Ruby on Rails, Groovy and Grails, and C/C++.

Requirement:

1. Sun's JAVA 6 (JDK-6u27 & JRE-6u27) (Required .bin package)
2. NetBean 6.9.1
http://www.blogger.com/img/blank.gif
Note:http://www.blogger.com/img/blank.gif
Before trying to install NetBean package, 1st Install JAVA package, Java package will come in JDK & JRE with .ban format.

Download Packages from Website:

1. SUN JAVA 6

A. download JDK software from below link

http://www.oracle.com/technetwork/java/javase/downloads/jdk-6u27-download-440405.html

download jdk-6u27-linux-i586-rpm.bin

B. download JRE software from below link

http://www.oracle.com/technetwork/java/javase/downloads/jre-6u27-download-440425.html

download jre-6u27-linux-i586-rpm.bin

2. NetBean 6.9.1

download NetBean software from below link

http://netbeans.org/downloads/index.html

SETUP:

1. INSTALL JAVA

Give Execute permission to jdk-6u27 file
[root@sandeep-linux-server NetBeans]chmod +x jdk-6u27-linux-i586-rpm.bin

[root@sandeep-linux-server NetBeans]# ./jdk-6u27-linux-i586-rpm.bin
Unpacking...
Checksumming...
Extracting...
UnZipSFX 5.50 of 17 February 2002, by Info-ZIP (Zip-Bugs@lists.wku.edu).
inflating: jdk-6u27-linux-i586.rpm
inflating: sun-javadb-common-10.6.2-1.1.i386.rpm
inflating: sun-javadb-core-10.6.2-1.1.i386.rpm
inflating: sun-javadb-client-10.6.2-1.1.i386.rpm
inflating: sun-javadb-demo-10.6.2-1.1.i386.rpm
inflating: sun-javadb-docs-10.6.2-1.1.i386.rpm
inflating: sun-javadb-javadoc-10.6.2-1.1.i386.rpm
Preparing... ########################################### [100%]
1:jdk warning: /etc/.java/.systemPrefs/.system.lock created as /etc/.java/.systemPrefs/.system.lock.rpmnew
warning: /etc/.java/.systemPrefs/.systemRootModFile created as /etc/.java/.systemPrefs/.systemRootModFile.rpmnew
warning: /etc/init.d/jexec saved as /etc/init.d/jexec.rpmorig
########################################### [100%]
Unpacking JAR files...
rt.jar...
jsse.jar...
charsets.jar...
tools.jar...
localedata.jar...
plugin.jar...
javaws.jar...
deploy.jar...
Installing JavaDB
Preparing... ########################################### [100%]
1:sun-javadb-common ########################################### [ 17%]
2:sun-javadb-core ########################################### [ 33%]
3:sun-javadb-client ########################################### [ 50%]
4:sun-javadb-demo ########################################### [ 67%]
5:sun-javadb-docs ########################################### [ 83%]
6:sun-javadb-javadoc ########################################### [100%]

Java(TM) SE Development Kit 6 successfully installed.

Product Registration is FREE and includes many benefits:
* Notification of new versions, patches, and updates
* Special offers on Oracle products, services and training
* Access to early releases and documentation

Product and system data will be collected. If your configuration
supports a browser, the JDK Product Registration form will
be presented. If you do not register, none of this information
will be saved. You may also register your JDK later by
opening the register.html file (located in the JDK installation
directory) in a browser.
For more information on what data Registration collects and
how it is managed and used, see:
http://java.sun.com/javase/registration/JDKRegistrationPrivacy.html
Press Enter to continue.....
Done.
[root@sandeep-linux-server NetBeans]#

2. INSTALL NETBEAN

Give Execute permission to netbeans file
[root@sandeep-linux-server NetBeans]chmod +x netbeans-6.9.1-ml-javaee-linux.sh

[root@sandeep-linux-server NetBeans]# ./netbeans-6.9.1-ml-javaee-linux.sh
Configuring the installer...
Searching for JVM on the system...
Extracting installation data...
Running the installer wizard...
[root@rajsekhar NetBeans]#

Now it will open one Installation window follow with that.

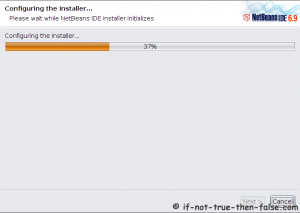
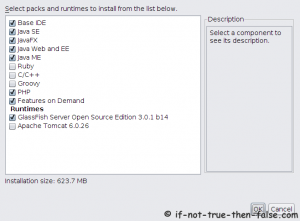
1. NetBeans 6.9.1 Installer starts


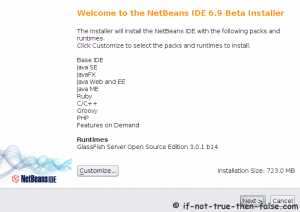
2. NetBeans IDE 6.9.1 Welcome Screen


3. With full package is possible customize module selection, with clicking customize button:


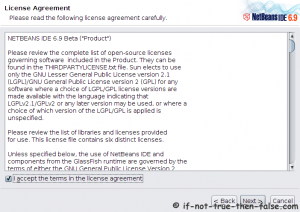
4. Accept NetBeans 6.9.1 License


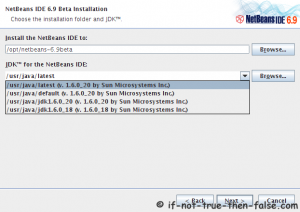
5. Choose a NetBeans 6.9.1 Installation Directory and JDK Directory


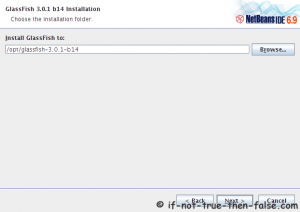
6. If GlassFish Application Server is also selected to Installation then select Directory also for GlassFish:


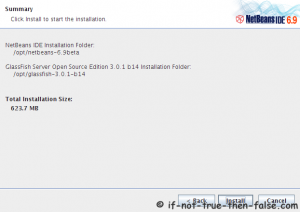
7. Check NetBeans 6.9.1 Installation Summary


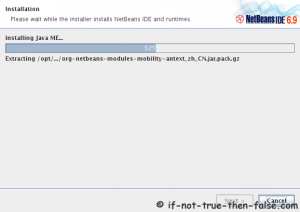
8. Installing NetBeans 6.9.1 IDE


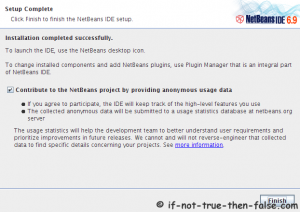
9. NetBeans 6.9.1 IDE Installation Complete


10. Now check on Desktop, One Netbean icon will be created, click on that.

OR
/directory-name/netbeans-6.9.1/bin/netbeans


Thanks and Regards,
Sandeep CC

Monday, September 19, 2011

How To Access Windows Shared File/Folders In REDHAT LINUX Machine


How To Access Windows Shared File/Folders In Linux Machine

Note: For Accessing Windows Server 1st we have to configure Samba & Need to Start Samba Service, so 1st try to configure samba.

THIS IS OPTIONAL, IF WE USE SMBCLIENT THEN THIS STEP IS REQUIRED
(For Configuring Samba Server click on bellow link
"http://ccsandeep.blogspot.com/2010/05/configure-samba-on-rhel4.html" )

IMP POINTS:

1. Linux Machine and Windows Shared Machine Should Be In Same Network.

2. Linux Server Name: sandeep-linux-server & IP: 172.16.4.81
Windows Shared Name: sandeep & IP: 172.16.4.82 (User Name: sandeep & Password: sandeep123)

3. Share one folder in Windows Machine (Shared Folder Name = "shared-fodler")

4. Try To Ping Windows Machine from Linux Machine.
EXP: [root@sandeep-linux-server ~]# ping 172.16.4.82
PING 172.16.4.82 (172.16.4.82) 56(84) bytes of data.
64 bytes from 172.16.4.82: icmp_seq=1 ttl=128 time=0.726 ms
64 bytes from 172.16.4.82: icmp_seq=2 ttl=128 time=0.612 ms
64 bytes from 172.16.4.82: icmp_seq=3 ttl=128 time=0.469 ms
64 bytes from 172.16.4.82: icmp_seq=4 ttl=128 time=0.453 ms

--- 172.16.4.82 ping statistics ---
4 packets transmitted, 4 received, 0% packet loss, time 3001ms
rtt min/avg/max/mdev = 0.453/0.565/0.726/0.111 ms
[root@sandeep-linux-server ~]#

5. Must Need To Know Windows Shared Machine Name, User Mame & Password.


Steps:

1. Create One Directory in Linux on /mnt directory(Here we are mounting windows file in this directory)

[root@sandeep-linux-server ~]# cd /mnt/
[root@sandeep-linux-server mnt]# mkdir Windows
[root@sandeep-linux-server mnt]# ll
total 104
drwxr-xr-x 2 root root 4096 Sep 19 18:07 Windows
[root@sandeep-linux-server mnt]#

2. Now Mount Windows Shared folder into Linux /mnt/Windows directory (here need to give username=myuser, password=mypassword & windows shared machine name with directory)

[root@sandeep-linux-server mnt]# mount -t ntfs -o username=sandeep,password=sandeep123 //172.16.4.82/shared-folder /mnt/Windows/
[root@sandeep-linux-server mnt]# ll
total 192
drwxrwxrwx 1 root root 98304 Sep 15 14:24 Windows
[root@sandeep-linux-server mnt]#

OR

[root@sandeep-linux-server mnt]# mount -o username=sandeep,password=sandeep123 //172.16.4.82/shared-folder /mnt/Windows/
[root@sandeep-linux-server mnt]# ll
total 192
drwxrwxrwx 1 root root 98304 Sep 15 14:24 Windows
[root@sandeep-linux-server mnt]#

3. Now Check windows shared folder has mounted in linux machine...

[root@sandeep-linux-server mnt]# cd Windows/
[root@sandeep-linux-server Windows]# ll
total 5125818
-rwxrwSrwt 1 root root 121955032 Feb 21 2011 195.62_notebook_winvista_win7_32bit_international_whql.exe
drwxrwxrwx 1 root root 0 Mar 5 2011 ABBYYFineReaderPro7
-rwxrwSrwt 1 root root 17409 Jul 3 2007 Abhi_Time.htm
drwxrwxrwx 1 root root 0 Jul 22 10:26 ACDSee 8

4. Now check Unmount with Mounted diretory (Here "Windows" directory showing Total 0 file's)

[root@sandeep-linux-server mnt]# umount //172.16.4.82/shared-folder /mnt/Windows/
[root@sandeep-linux-server mnt]# ll
total 104
drwxr-xr-x 2 root root 4096 Sep 19 18:07 Windows
[root@sandeep-linux-server mnt]#cd Windows/
[root@sandeep-linux-server Windows]# ll
total 0
[root@sandeep-linux-server Windows]#


Thanks & Regards,
Sandeep CC
Thursday, August 11, 2011

Installation Of Team Viewer On REDHAT LINUX-5


Setup:

Machine Name: sandeeplinux3 (Connected To Internet)

Requirement:

Team Viewer RPM Package

Download Required Packages From Website:

Website: http://www.teamviewer.com/hi/download/index.aspx and Save on Desktop in Linux Machine.

Note: Installation steps should do in root user.

Installation Of Required Packages:

Login As Root User
[sandeep@sandeeplinux3 ]$su -l root

[root@sandeeplinux3 ]# [Right Click On Desktop --> Open Terminal.]

[root@sandeeplinux3 ]#cd Desktop
[root@sandeeplinux3 Desktop]#rpm -i teamviewer_linux.rpm

Now Teamviwer has installed, Confirm once package installed properly or not

[root@sandeeplinux3 Desktop]#rpm -qa |grep teamviewer

OR

Go to Application --> Internet --> TeamViewer (After Installing Teamviewer RPM it should show in Application --> Internet)

Note: Teamviewer can't open in Root User (will give good trick for root later) so logoff root user and go normal user and Go to Application --> Internet --> Click on TeamViewer

For Root User

Now Here I am going to post 1 trick for TeamViewer. Many Users who likes to work as root and but in RHEL-5 there is restriction for Running as root.

Whenever you are trying to run TeamViewer as root from Terminal, You will get message like below :-

TeamViewer must not be executed as root!

By Following few steps you will be able to run TeamViewer as root.

Follow Steps to run TeamViewer As root.

1. Login as root user to do these all steps.
2. Open Terminal Go to Applications -> System Tools -> Terminal
3. Now Lets find where exactly teamviewer command is. Execute Following command to Find it out.
[root@sandeeplinux3 ]#which teamviewer
/usr/bin/teamviewer <– You will get this kind of output on your terminal
4. Be safe So First Lets take a backup of Original TeamViewer Command. Execute Following Command
[root@sandeeplinux3 ]#cp /usr/bin/teamviewer /usr/bin/teamviewer.orig

5. Open teamviewer file. Here in /usr/bin/teamviewer they have put the restriction for root user. So Lets Remove it. Open File By Executing vi /usr/bin/teamviewer and You will able to see following lines into /usr/bin/teamviewer :-

userid=$(id -u)

if [ $userid = 0 ]
then
echo TeamViewer must not be executed as root!
exit 1
fi

CHANGE those line to

##userid=$(id -u)

##if [ $userid = 0 ]
##then
## echo TeamViewer must not be executed as root!
## exit 1
##fi

Save and Exit this file ( Press “ESC” then Press :wq! )

6. To Open TeamViewer from GUI. Click on Applications -> Internet -> TeamViewer
7. To Open TeamViewer from Terminal Click on Applications -> System Tools -> Terminal. On Terminal Execute Command teamviewer

Testing TeamViewer between Linux-Linux OR Linux-Windows OR Windows-Linux


Linux-Linux (For another linux machine follow installation step as per given above)

Machine Name's: Linux1 & Linux2

Linux1
Login as Normal User

Go to Application --> Internet --> Click on TeamViewer --> It will open one Window with user ID and Password.

Linux2
Login as Normal User

Go to Application --> Internet --> Click on TeamViewer --> It will open one Window with user ID and Password.

Now go to any one machine and give User Name and Password of another Machine and Connect --> Now you can see Remote Desktop Of 1st Machine.


Linux-Windows OR Windows-Linux

On Linux Machine:

Login as Normal User

Go to Application --> Internet --> Click on TeamViewer --> It will open one Window with user ID and Password.

On Windows Machine:

Note: Download .exe package and Install in windows machine (Download Website: http://www.teamviewer.com/hi/download/index.aspx)

Go to Start --> All Programs --> Click On TeamViewer Application.

Now go to any one machine and give User Name and Password of another Machine and Connect --> Now you can see Remote Desktop of 1st Machine.


If anything kind of doubts please reply to this post i will correct ASAP.....

SQUID Configuration On REDHAT LINUX-5


SQUID (PROXY SERVER)

Setup:

Server: sandeeplinux-server (192.168.4.1 Local Network IP)
Client: Linux & Windows XP/2003 etc...
Default Port NO: 3128

Requirement: This SQUID package available on RHEL5 DVD only
squid-2.6.STABLE6-3.el5

Installation Of Required Packages:

[root@sandeeplinux-server RHEL5_Total_Pack]# rpm -i squid-2.6.STABLE6-3.el5
warning: squid-2.6.STABLE6-3.el5: Header V3 DSA signature: NOKEY, key ID 37017186
[root@sandeeplinux-server RHEL5_Total_Pack]#

Configure SQUID config file:

NOTE: Modify squid.conf file (Before Modifying any Files take one backup copy)

[root@sandeeplinux-server ~]# cd /etc/squid
[root@sandeeplinux-server squid]# vi squid.conf

Uncomment Bellow lines in config file...


Access Control Lists

# Add in ACL your local network information
acl all src 192.168.1.0/255.255.255.0 (Allow here your local network Address)

One Sample Passage for ACL configuration

#Recommended minimum configuration:
acl all src 192.168.4.0/255.255.255.0
acl manager proto cache_object
acl localhost src 127.0.0.1/255.255.255.255
acl to_localhost dst 127.0.0.0/8
acl SSL_ports port 443
acl Safe_ports port 80 # http
acl Safe_ports port 21 # ftp
acl Safe_ports port 443 # https
acl Safe_ports port 70 # gopher
acl Safe_ports port 210 # wais
acl Safe_ports port 1025-65535 # unregistered ports
acl Safe_ports port 280 # http-mgmt
acl Safe_ports port 488 # gss-http
acl Safe_ports port 591 # filemaker
acl Safe_ports port 777 # multiling http
acl CONNECT method CONNECT
acl blocksites dstdomain .orkut.com
acl blocksites dstdomain .facebook.com
acl blocksites dstdomain .youtube.com
http_access deny blocksites
acl banned src 192.168.4.3
http_access deny banned
acl localnetwork src 192.168.1.0/24
http_access allow localnetwork
acl blockfiles urlpath_regex /etc/squid/blocks.files.acl
deny_info ERR_BLOCKED_FILES blockfiles
http_access deny blockfiles
acl business_hours time M T W H F 9:00-19:00
acl RestrictedHost src 192.168.1.3
http_access deny RestrictedHost
http_access allow business_hours
acl bad url_regex "/etc/squid/squid-block.acl"
http_access deny bad

Now Try To Start SQUID Service & Keep Permanently On:

[root@sandeeplinux-server squid]# service squid status
squid is stopped
[root@sandeeplinux-server squid]# service squid start
Starting squid: [OK]
[root@sandeeplinux-server squid]# chkconfig squid on
[root@sandeeplinux-server squid]#

Now Check SQUID/PROXY with Windows Client:

Go To Internet Explore --> Properties --> Connections --> LAN Settings --> Use a Proxy Server for your LAN --> Give server IP or Name --> Port 3128 --> OK


BLOCKED SITE EXAMPLE (ORKUT SITE)

For Writing our own Notice Messages and all modification you can do in /usr/share/squid/errors/English

[root@sandeeplinux-server English]# vi ERR_ACCESS_DENIED

Write Message Save & Exit and Restart once your squid server.


Thanks and Regards,
Sandeep CC